Minecraft-Train-Arrival-Board
Minecraft Train Arrival Board
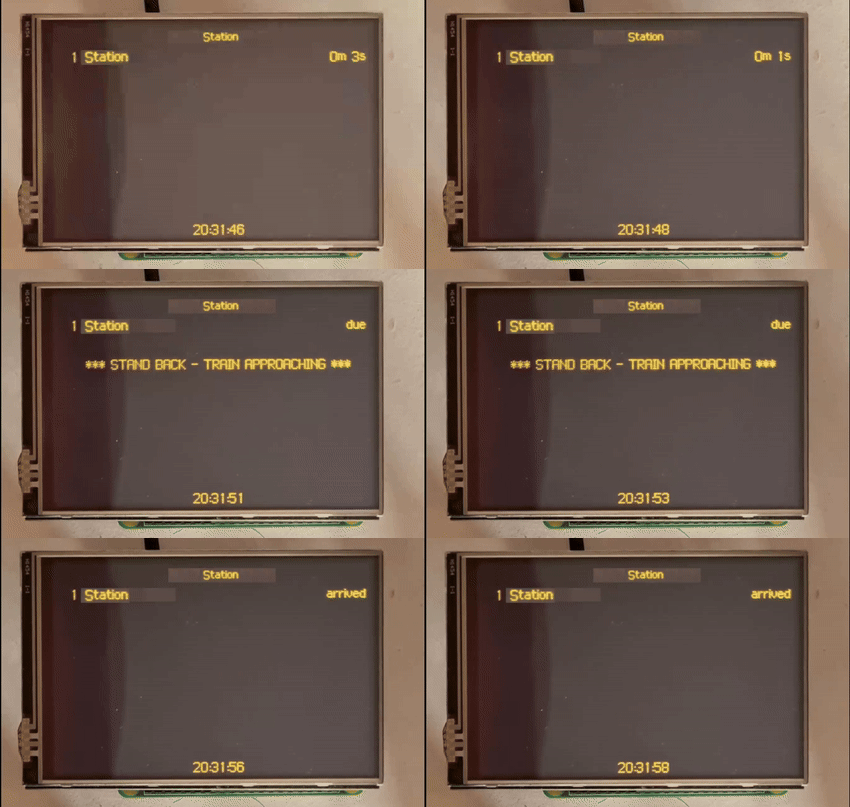
A Mini Minecraft Transit Railway PID in Real Life!

Pre-Requisites
Hardware
- Raspberry Pi (or another similar device)
- 3.5 Inch SPI Screen
- SD Card (sufficent enough to store Raspbian)
- GPIO Pins (if your display is connected via the GPIO pins)
- Power Cable (for RPI or similar device)
Software
- Minecraft Server with Web Software (i.e. Nginx, Apache, Jetty etc)
- Minecraft Transit Railway Mod (on the Minecraft server)
- Raspbian (or another linux distro)
- Display Drivers (if required, varies by what screen you have or bought)
Notice
I am not responsible for anything that happens to you or your hardware/devices.
Guide
Finding your station(s) ID(s)
Step 1. Go to YOURIP:8888/index.html (replacing YOURIP with your servers ip).
Step 2. In the search bar type the name of a station in your server then click on it (if it shows up underneath the search bar) after press the F12 key (to open dev tools) then go to the network tab and right click on the piece of data that says something like “arrivals?worldIndex” then hover over copy then press “Copy URL” (if “arrivals?worldIndex” isn’t there wait until a station/destination shows up at the bottom of the box that has the name of your station).
Minecraft Server
Step 1. Download the PID.html file and the London Underground Regular.ttf from the Repo.
Step 2. Replace the “http://YOURIP:8888/arrivals?worldIndex=0&stationId=STATIONID” in the “” with the URL you copied from the network tab (see finding your station(s) ID(s) above), Replace Station 1 with the name of your station.
Step 3. Replace all mentions of YOURIP with Your Server’s IP in the PID.html file, if you have SSL on your server replace http with https.
Step 4. Upload your modified PID.html file and the London Underground Regular.ttf to your server’s website files using FTP (Click this if you don’t know how to FTP into your server) or if you have dynmap installed drop it into the web folder inside of the dynmap folder.
Raspberry Pi (or other device)
Step 1. Flashing Raspbian (or another Linux distro) to your SD Card, I suggest using the Raspberry Pi Imager or Balena Etcher. If your screen has its own Linux Distro or remix of Raspbian you may want to flash that to the SD Card Instead.
Step 2. Plug your screen into your Pi (or similar device), install any drivers that your display may need.
Step 3. Insert your SD Card with the flashed OS into your Pi and then plug in the power and power on the device.
Step 4. Set up Linux/Raspbian as normal (make sure you’ve got SSH enabled and know your username and password, by default it may be username: pi password: raspberry).
Step 5. SSHing into your Pi: Use an SSH app like Putty (Windows) or ConnectBot (Android). Once in type or paste: “sudo apt-get update sudo apt-get install chromium-browser” without the quotations (How to SSH?).
Step 6. Unclutter: whilst SSH’d run “sudo apt-get install unclutter” in the terminal.
Step 7. Crontab: whilst SSH’d into your Pi’s terminal type “sudo crontab -e” if prompted to select an editor type “1” then press enter, once in nano/crontab add “@reboot unclutter -idle 0 &” to the bottom of the file.
Step 8. Auto-Start: In your Terminal (in ssh) type “sudo nano /etc/xdg/lxsession/LXDE-pi/autostart” and then add “@xset s off @xset -dpms @xset s noblank @chromium-browser –kiosk http://YOURSERVERIP:PORT/PID.html/ # load chromium after boot and open the website in full screen mode” (replace YOURSERVERIP with your server IP and PORT with the port your website is on) once done press CTRL-X and then Y and then press enter (this will save the file in nano).
Step 9. Restart your Pi (or similar device), once the pi boots after some time you should see the PID.html page.
If you’ve made it here and done all the steps you should be finished and now have your very own real life Mini Minecraft Transit Railway PID.